• Skip to primary navigation
  • Skip to main content
  • Skip to primary sidebar
  • About
  • Recipes
  • eBooks
  • Spring
  • FREE EBOOK

Create Mindfully

menu icon
go to homepage
  • About
  • Recipes
  • eBooks
  • Spring
  • FREE EBOOK
    • Facebook
    • Instagram
    • Pinterest
  • subscribe
    search icon
    Homepage link
    • About
    • Recipes
    • eBooks
    • Spring
    • FREE EBOOK
    • Facebook
    • Instagram
    • Pinterest
  • ×
    Home » DIY

    Modified: Oct 30, 2023 · Published: Dec 3, 2016 by Willow Moon · This post may contain affiliate links. · As an Amazon Associate I earn from qualifying purchases. · I get commissions for purchases made through links in this post.

    How to Make Polymer Clay Ornaments

    Jump to Recipe Pin

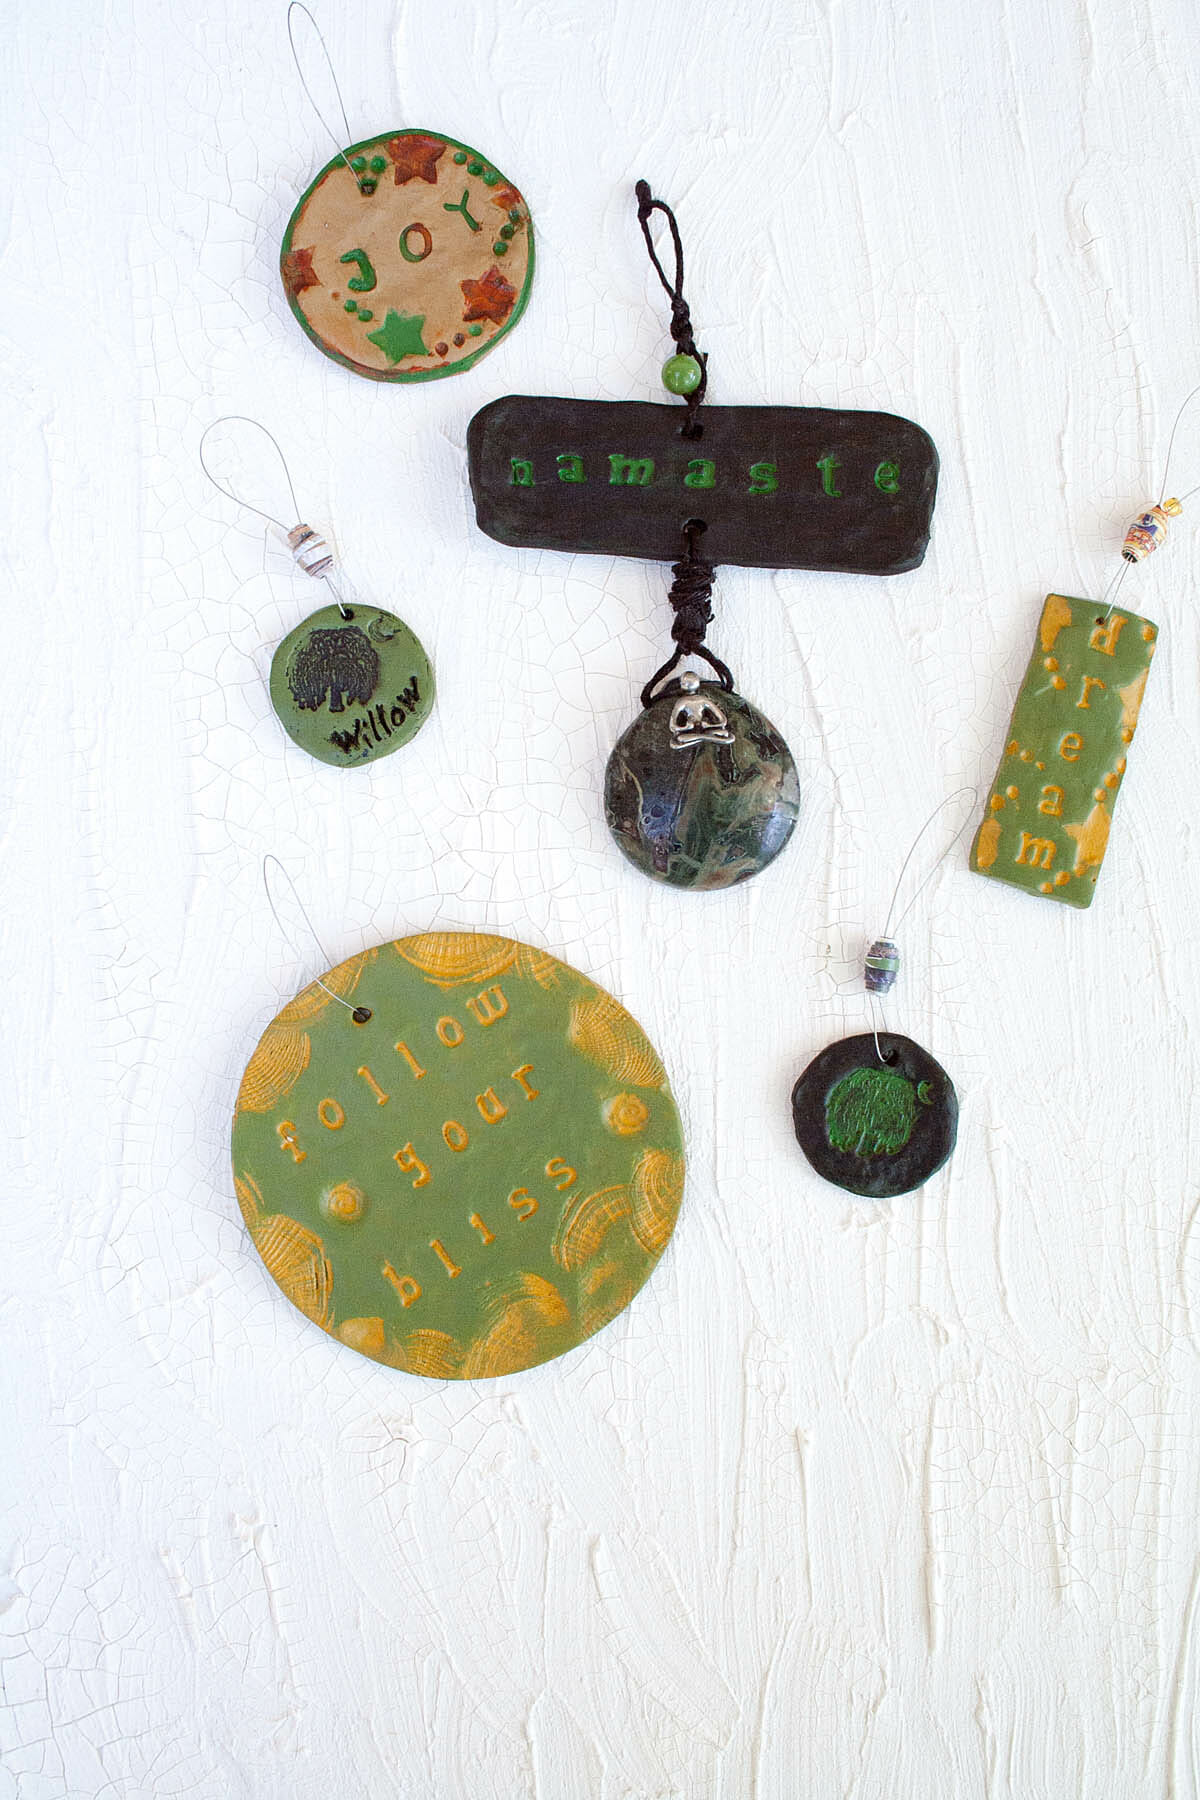
    These easy DIY polymer clay ornaments are something that anyone can make. You need very few materials to get you started.

     Follow Your Bliss polymer clay ornament hanging on artificial tree.

    💌 SAVE THIS

    I'll email this post to you, so you can come back to it later!

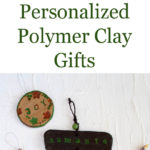
    Today I am going to show you how to make personalized polymer clay ornaments. Polymer clay is a durable, water-resistant plastic after it bakes.

    Polymer clay sells for around $3 for a small block, which goes a long way depending upon the size of your pieces. It comes in many different colors, but for starting out you may want to use white.

    You can always paint it after it bakes to get the color you want. I like to use acrylic paint because it dries quicker than oil paint and it doesn't have as strong of an odor.

    Painted polymer clay ornaments.

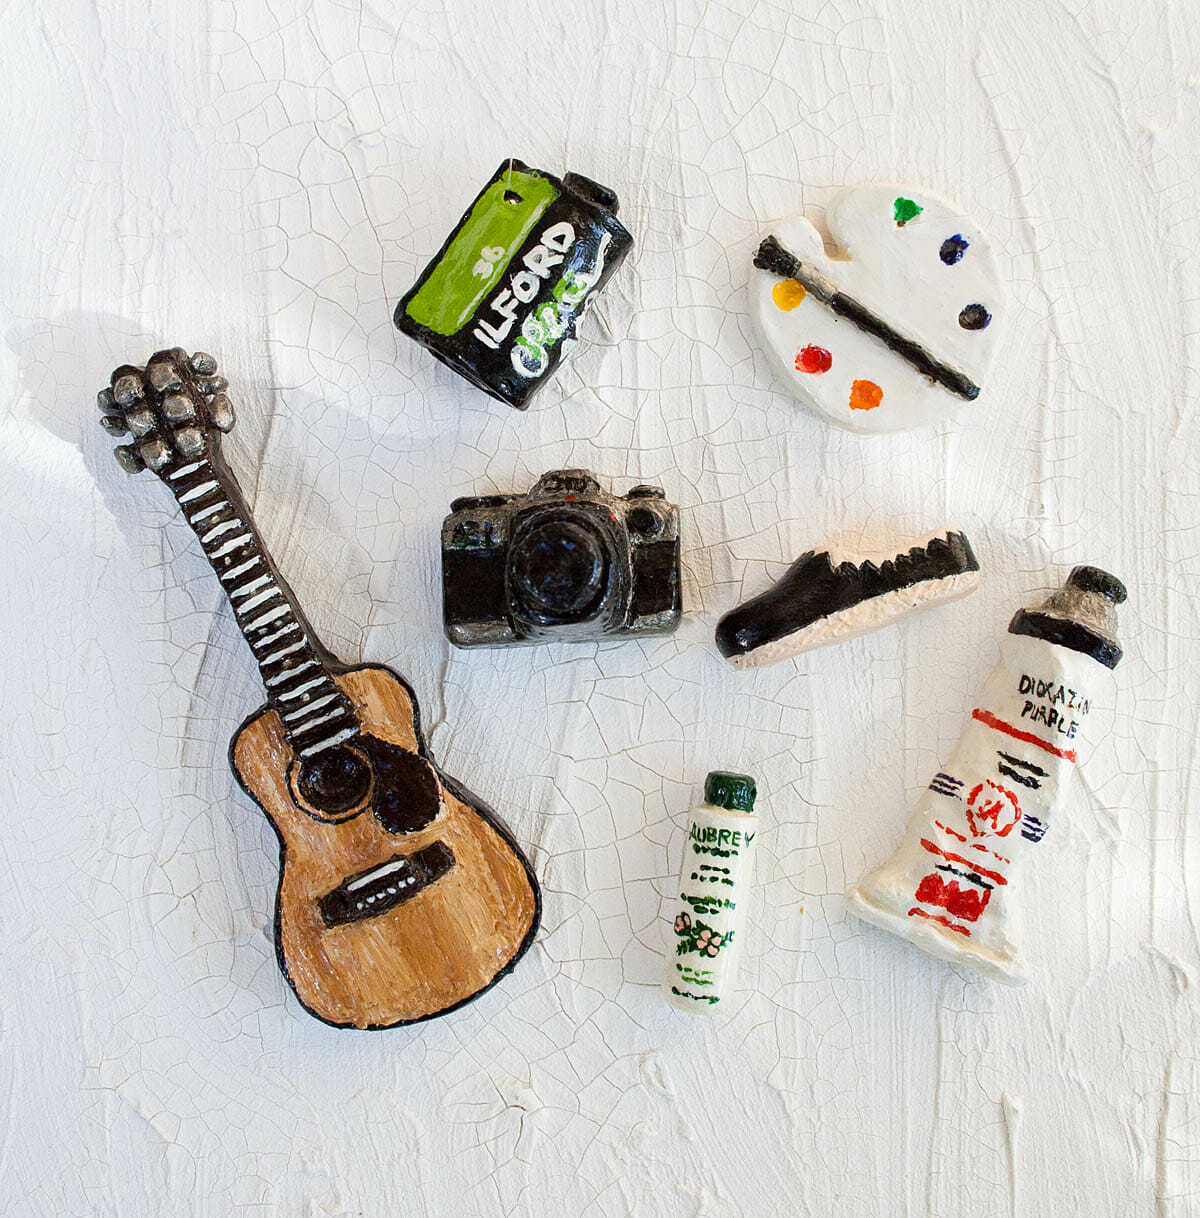
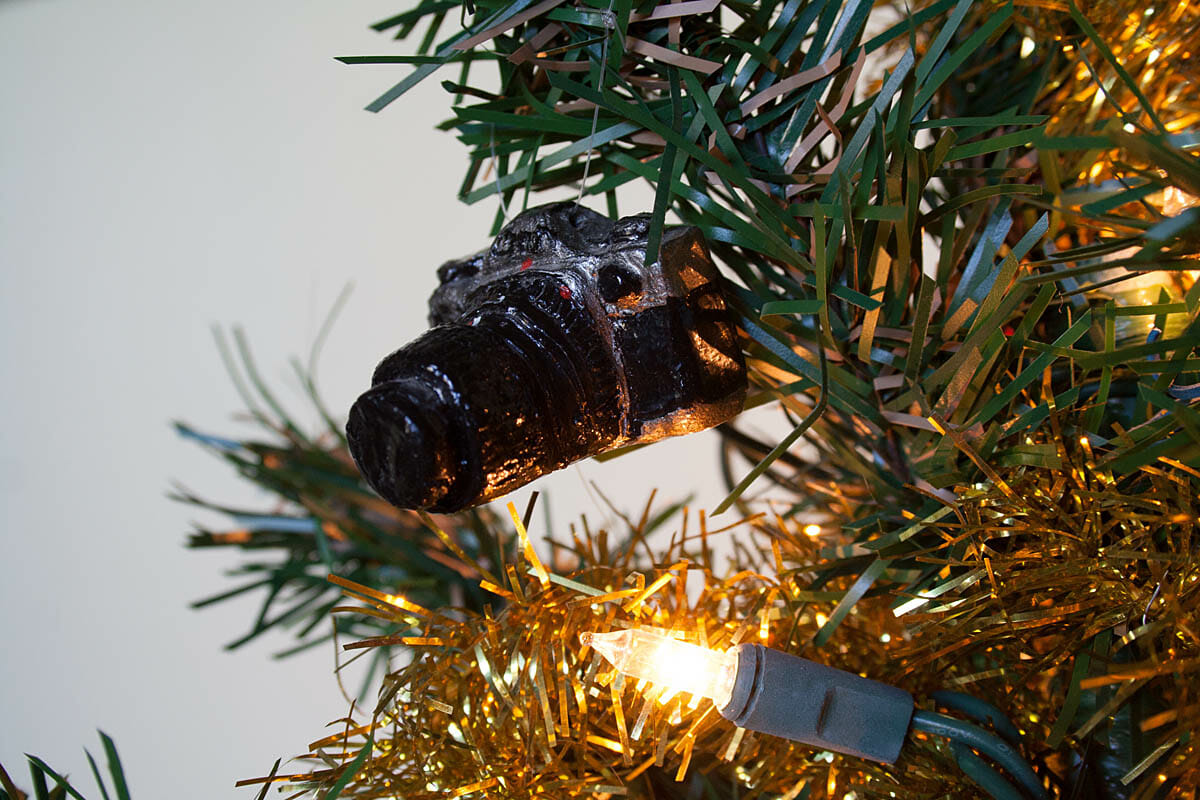
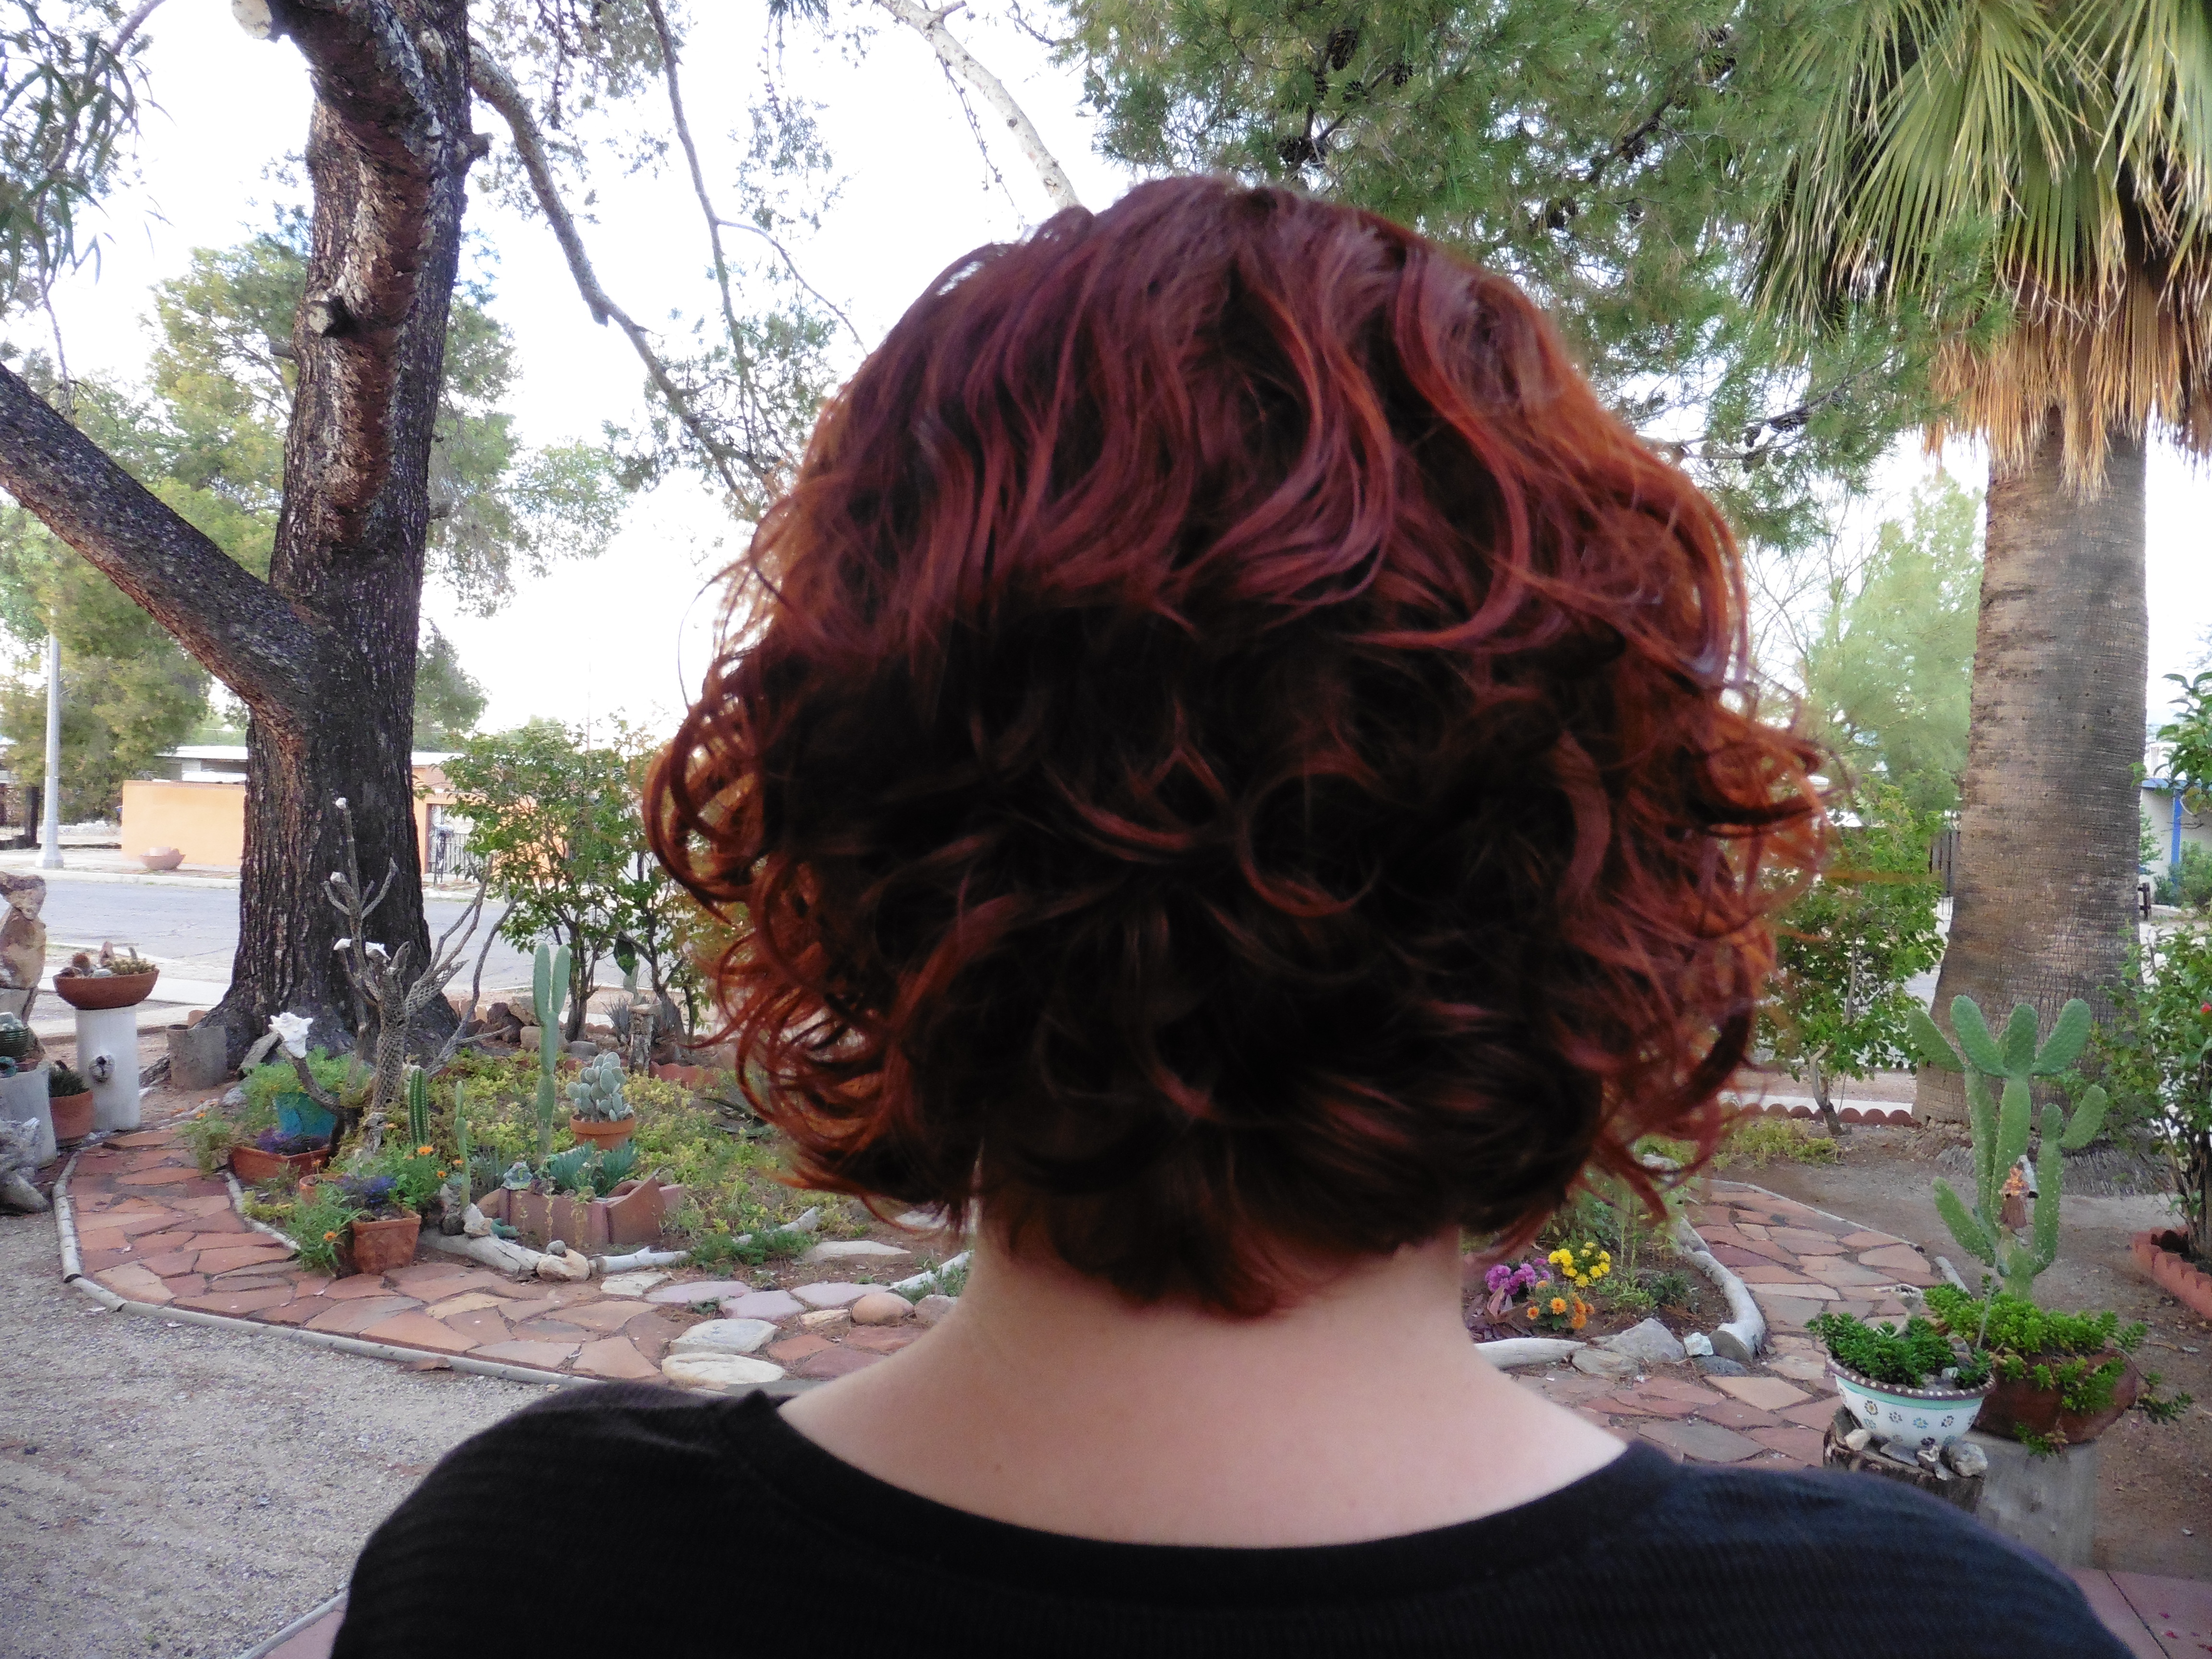
    I started using polymer clay almost twenty years ago. Back then I made free-handed sculpted ornaments and jewelry.

    My first pieces were very intricate (photos ↑ above and below ↓), but today I am going to show you how to make some very basic pieces to get you started.

    You do not need to buy a lot of materials for starting out. In fact, I would go with as little as you can get by with. That way, you can see if you like using this medium, and you can buy more tools later.

    Jump to:
    • What You Will Need
    • Instructions
    • Gift Ideas
    • Other DIY
    • 💬 Comments
    Camera ornament on Christmas tree.

    What You Will Need

    Tools to make polymer clay ornaments.
    • Polymer clay - I used Sculpey Premo and Sculpey Soufflé
    • Work surface - ceramic tile, an acrylic board, a pane of glass, an old cutting board - I used a cutting board with parchment on top  (Not a surface you care about because polymer can damage / stain surfaces.)
    • Rolling tool: acrylic brayer, rolling pin, or glass bottle (anything that will help you roll the clay into a flat sheet)
    • Ruler
    • Letter or word stamps
    • Beads, shells, toothbrush or other texturing tools
    • X-acto or another craft knife
    • Cookie cutters or found objects of the shape you want
    • Needle tool or toothpicks
    • Clay shaper set (optional)
    • Baking sheet
    • Parchment paper
    • Zip lock bags - to store leftover clay
    • Oven or toaster oven
    • Oven thermometer (optional)
    • Acrylic paint
    • Paint brush
    • Old rag
    • Cotton swabs
    • String, bead cord, stainless steel bead stringing wire, or wire
    • Beads (optional)
    Top 10 Vegan Recipes ebook cover.

    FREE EBOOK!

    Sign Up For My Newsletter

    Get a FREE ebook with my Top 10 Vegan Recipes as a welcome gift!

    Unsubscribe at any time.

    Instructions

    Step 1: Preheat your oven to the temperature that the polymer clay manufacturer recommends on the package.

    Step 2: Wash your hands well. The clay will pick up dirt, debris, fiber, or anything else you may have on your hands.

    Step 3: Knead the clay in your hands to soften it up.

    Clay rolled out with brayer next to it.

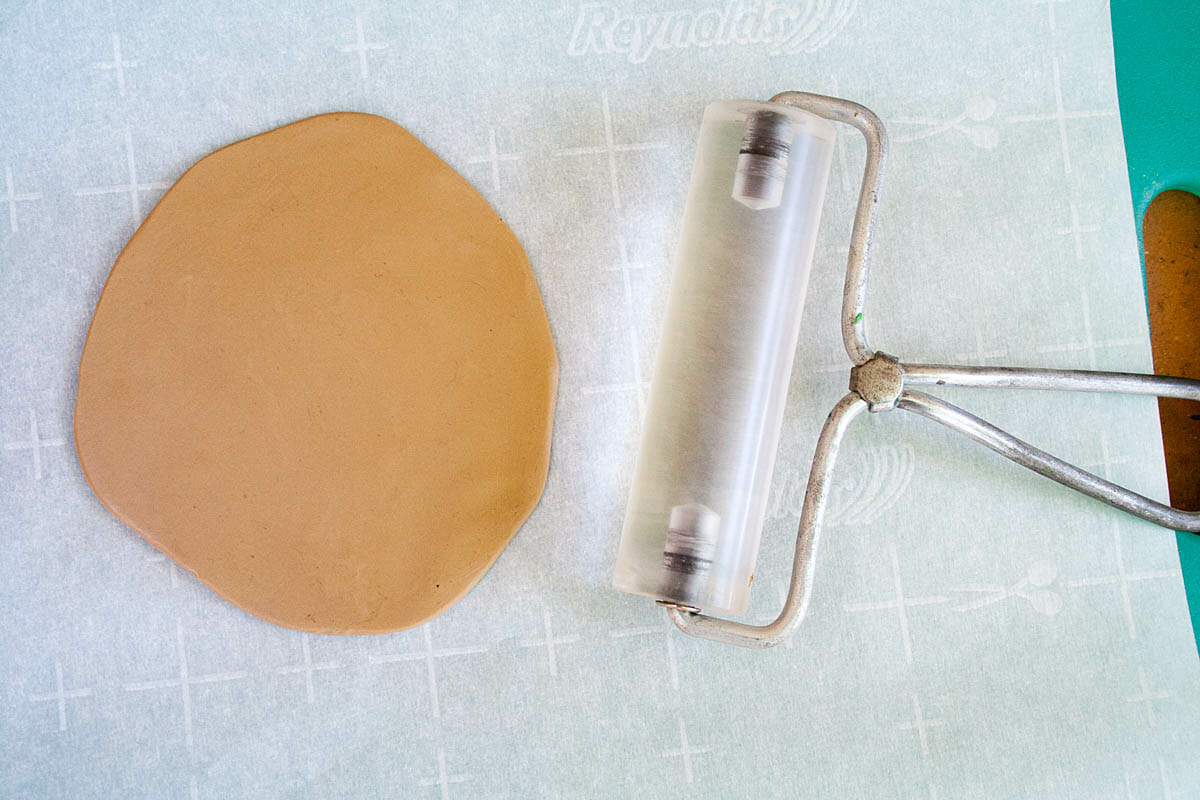
    Step 4: Flatten the clay on a work surface and roll it out to about ⅛ - ¼"*. I made mine ⅛". The thicker it is, the stronger it will be. I was not concerned with it being super sturdy, so I made mine thin.

    Clay stamped with the word joy.

    Step 5: Using letter stamps,  stamp the words you want in your clay.

    Step 6: Add a design with beads, shells or other texturing tools, if you wish.

    Step 7: Using a cookie cutter or found object, cut out your shape.

    Step 8: Pierce a hole for hanging with a needle tool or toothpick.

    Step 9: Bake according to the manufacturer's directions*. Let cool completely.

    Clay ornament with paint on it.

    Step 10: Paint in the design area, making sure to get paint into the letters.

    Clay ornament with the surface wiped off and paint left in the crevices.

    Step 11: Using cotton swabs or a wet rag, wipe the paint off the top surface, so that the paint is left only in the design area. Let dry.

    Polymer clay ornaments on a white surface.

    Step 12: Add string or wire and beads, if desired.

    Gift Ideas

    • Jewelry
    • Ornaments
    • Gift tags
    • Wine charms
    • Bookmarkers
    • Garden markers

    Other DIY

    • How to Color Your Hair with Henna
      How to Color Your Hair with Henna
    • Peppermint Foot Scrub
      Peppermint Foot Scrub
    • Tea Tree Oil Foot Scrub
      Tea Tree Oil Foot Scrub

    If you tried making these Polymer Clay Ornaments or any recipe on my website, please leave a ⭐️ star rating and let me know how you like it in the 💬 comments below. I love hearing from you!

    Follow Your Bliss polymer clay ornament hanging on Christmas tree.
    Pin Print Add to Shopping List Go to Shopping List
    5 from 1 vote

    How to Make Polymer Clay Ornaments

    These easy DIY polymer clay oraments are something that anyone can make. You need very few materials to get you started.
    Author Willow Moon
    Prevent your screen from going dark

    Materials

    • Polymer clay I used Sculpey Premo and Sculpey Soufflé
    • Work surface ceramic tile, an acrylic board, a pane of glass, an old cutting board 
    • Rolling tool acrylic brayer, rolling pin, or glass bottle
    • Ruler
    • Letter or word stamps
    • Beads, shells, toothbrush or other texturing tools
    • X-acto or another craft knife
    • Cookie cutters or found objects of the shape you want
    • Needle tool or toothpicks
    • Clay shaper set (optional)
    • Baking sheet
    • Parchment paper
    • Zip lock bags - to store leftover clay
    • Oven or toaster oven
    • Oven thermometer (optional)
    • Acrylic paint
    • Paint brush
    • Old rag
    • Cotton swabs
    • String, bead cord, stainless steel bead stringing wire, or wire
    • Beads (optional)

    Instructions

    • Preheat your oven to the temperature that the polymer clay manufacturer recommends on the package.
    • Wash your hands well. The clay will pick up dirt, debris, fiber, or anything else you may have on your hands.
    • Knead the clay in your hands to soften it up.
    • Flatten the clay on a work surface and roll it out to about ⅛ - ¼"*. I made mine ⅛". The thicker it is, the stronger it will be. I was not concerned with it being super sturdy, so I made mine thin.
    • Using letter stamps,  stamp the words you want in your clay.
    • Add a design with beads, shells or other texturing tools, if you wish.
    • Using a cookie cutter or found object, cut out your shape.
    • Pierce a hole for hanging with a needle tool or toothpick.
    • Bake according to the manufacturer's directions*. Let cool completely.
    • Paint in the design area, making sure to get paint into the letters.
    • Using cotton swabs or a wet rag, wipe paint off the top surface, so that paint is left only in the design area. Let dry.
    • Add string or wire and beads, if desired.

    Notes

    I used a cutting board with parchment on top. You don't want to use a surface you care about because polymer can damage / stain surfaces.
    Note that polymer clay is still flexible after baking and will not be totally stiff, especially thinner pieces.
    Not all clay is created equal, so rolling it out to ⅛" may not be a good idea for some types of clay. Some brands are stronger than others, while some become brittle after baking. I have worked with Premo, Fimo, and Souffle and had no problems.
    I would check out polymer clay websites for more information on which are the best. I tend to stick with the brands that I know, so I have not experimented with any brands other than the mentioned ones above.
    I actually bake my projects longer than suggested. I find that the manufacturer's times are not long enough. I baked mine for an hour. If you research how long to bake polymer clay, you will find that many polymer clay artists bake theirs longer also.

    💌 SAVE THIS

    I'll email this post to you, so you can come back to it later!

    SIGN UP for my newsletter, get a FREE 30 Minute Vegan Dinners 7-Day Meal Plan as a welcome gift! 💌

    More DIY

    • Date Paste
      Easy Homemade Date Paste
    • Homemade Gluten Free Bread Crumbs
      Homemade Gluten Free Bread Crumbs
    • Chai Spice Mix
      Chai Spice Mix
    • Cashew Milk
      Cashew Milk

    Reader Interactions

    Comments

      5 from 1 vote (1 rating without comment)

      Leave a Reply Cancel reply

      Your email address will not be published. Required fields are marked *

      Recipe Rating


    1. Deboshree Dutta says

      December 07, 2016 at 11:51 am

      These are AMAZING! You are S-O talented!!! 🙂

      Reply
      • Willow Moon says

        December 07, 2016 at 2:54 pm

        Thanks, you are so kind!

        Reply
    2. The Southern Thing says

      December 07, 2016 at 11:19 am

      This is so neat! What a special personalized gift!

      Reply
    3. Jae | Dreaming of Leaving says

      December 07, 2016 at 10:42 am

      Love the creativity, these are super cute! xo

      Reply
      • Willow Moon says

        December 07, 2016 at 2:53 pm

        Thanks Jae!

        Reply
    4. Tiffany Cardenas says

      December 06, 2016 at 6:31 pm

      I love this so much! What a great way to give a personalized gift. I would love to be the recipient of one :).

      Reply
      • Willow Moon says

        December 07, 2016 at 2:52 pm

        Thanks Tiffany! You could always give yourself one!

        Reply
    5. Melissa says

      December 06, 2016 at 4:39 pm

      Lovely! This looks like a great project for Christmas.

      Reply
    6. Mistle says

      December 06, 2016 at 11:45 am

      Love these!!! How fun and creative! I have not made a home made ornament since I was young.

      Reply
      • Willow Moon says

        December 07, 2016 at 2:48 pm

        Thanks! They are fun! I love to give handmade gifts and these are perfect for that.

        Reply
    7. Emily Recipes to Nourish says

      December 06, 2016 at 10:00 am

      This is so cool! Such a great idea and so fun! I've never made anything like this before.

      Reply
      • Willow Moon says

        December 07, 2016 at 2:47 pm

        Thanks Emily! It is a fun medium to work with, and inexpensive too!

        Reply
    8. Mary says

      December 06, 2016 at 9:57 am

      I forgot how much I love working with Polymer Clay until I read your post. Thanks for the reminder. Your ornament is lovely!

      Reply
      • Willow Moon says

        December 07, 2016 at 2:46 pm

        Thanks Mary! I haven't played around with it until recently myself. I realized I was more patient with it in the past, as you can see from the more detailed ornaments, but I still enjoyed it and have been brainstorming other projects to do with it.

        Reply
    9. Maggie says

      December 06, 2016 at 8:52 am

      These are awesome! Such a good idea, and I'm going to steal it and do this craft with my boys. Thanks!

      Reply
      • Willow Moon says

        December 07, 2016 at 2:44 pm

        Great! I hope all of you have fun with it!

        Reply

    Primary Sidebar

    Willow Moon with green shirt and tie dye scarf.

    Namaste, I'm Willow!

    I've been vegan for 25 years and
    gluten-free for 13 years. I share easy and delicious vegan gluten-free recipes the whole family will love! Read more →

    Spring Recipes

    • Broccoli Fritters on a plate.
      Broccoli Fritters

    • Benedictine Tea Sandwiches on a plate.
      Benedictine Tea Sandwiches

    • Green Detox Juice
      Green Detox Juice

    • Caramelized Onion and Mushroom Pasta (vegan, gluten free) - This rich vegan gluten free pasta is perfect for date night. It has only a few ingredients, but tastes like it came from a restaurant.
      Caramelized Onion and Mushroom Pasta

    Popular Recipes

    • Chocolate Covered Peanut Butter Frozen Yogurt Bites
      Chocolate Covered Peanut Butter Frozen Yogurt Bites (Vegan)

    • Apple Pecan Chickpea Salad Sandwich on a plate.
      Apple Pecan Chickpea Salad Sandwich

    • Vegetable Fritter being dipped into vegan chipotle ranch dressing.
      The Most Amazing Vegetable Fritters

    • Homemade Payday Bars on parchment paper.
      Homemade Payday Bars

    • Chocolate Peanut Butter Chia pudding in a bowl.
      Chocolate Peanut Butter Chia Pudding

    • Banana Cream Pie Overnight Oats
      Banana Cream Pie Overnight Oats

    Footer

    ^ back to top

    About

    • About Me
    • Privacy Policy
    • Disclaimer
    • Disclosure Policy
    • Accessibility Statement

    Newsletter

    • Sign Up for my newsletter and get a FREE 30 Minute Vegan Dinners 7 Day Meal Plan as a welcome gift!

    Contact

    • Contact
    • Tip Jar

    Featured In:

    A list of magazines that Create Mindfully has been featured in like Good Housekeeping, Dr. Axe, Peta, and more.

    Copyright © 2014 - 2025
    Create Mindfully - All Rights Reserved.

    Unauthorized use and/or duplication of this material without express and written permission from this blog’s author is strictly prohibited. Excerpts and links may be used, provided that full and clear credit is given to Willow Moon and Create Mindfully with appropriate and specific direction to the original content. All photos and artwork are property of Willow Moon and Create Mindfully. Do not duplicate or copy without proper consent.

    Photo of polymer clay ornaments with text.

    Rate This Recipe

    Your vote:


    Let us know what you thought of this recipe:

    My family loved this!
    Thank you for sharing this recipe, I loved it!
    This worked exactly as written, thanks!

    Or write in your own words:

    A rating is required
    A name is required
    An email is required

    Recipe Ratings without Comment

    Something went wrong. Please try again.