
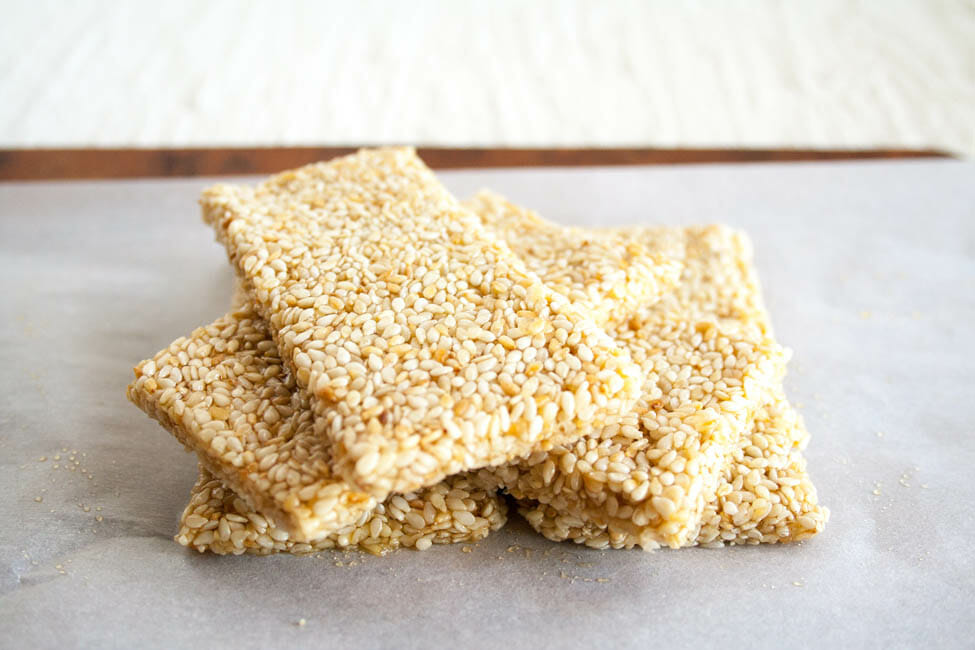
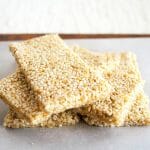
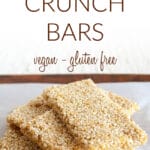
These Sesame Crunch Bars are a healthy grain free snack. Made with maple syrup, they are sweet and crunchy.

💌 SAVE THIS
⭐️⭐️⭐️⭐️⭐️
"I made these bars using the stove top method, and I split the maple syrup half and half with light agave syrup. Absolutely yummy ! - Gail"
I have been sesame seed obsessed lately. Not only do I love the taste, but when I found out how much calcium and magnesium they have, I started to include them in my diet daily.
I started eating them more after I fractured my ankle. Mainly, I include them in my morning smoothie, but these Sesame Crunch Bars are another way that I like to have them.
I first tried sesame seed candy and sesame crunch bars (Pasteli) many years ago, what feels like a lifetime ago, when I worked at a health food store. The bars were thin, and just like the name describes; crunchy.
Made with only a couple of ingredients, I was impressed at how good and how simple they were. I forgot about them until recently when I saw my 2 lb. bag of sesame seeds that I got from the bulk section of my local grocery store. It was such a big bag of sesame seeds that I figured I should include them in a recipe.
The most difficult thing about these sesame bars is waiting for them to cool off before diving into them.
If you're like me and go on road trips during the summer, this sesame brittle is the perfect snack to take along. It stays crunchy and it doesn't need to be packed in the cooler. If you're more of a travel by plane kind of person, it is great for that too!
Jump to:
❤️ Why You'll Love Them
- They're sweet and crunchy.
- They travel well.
- They make a great snack.
🧾 Ingredients
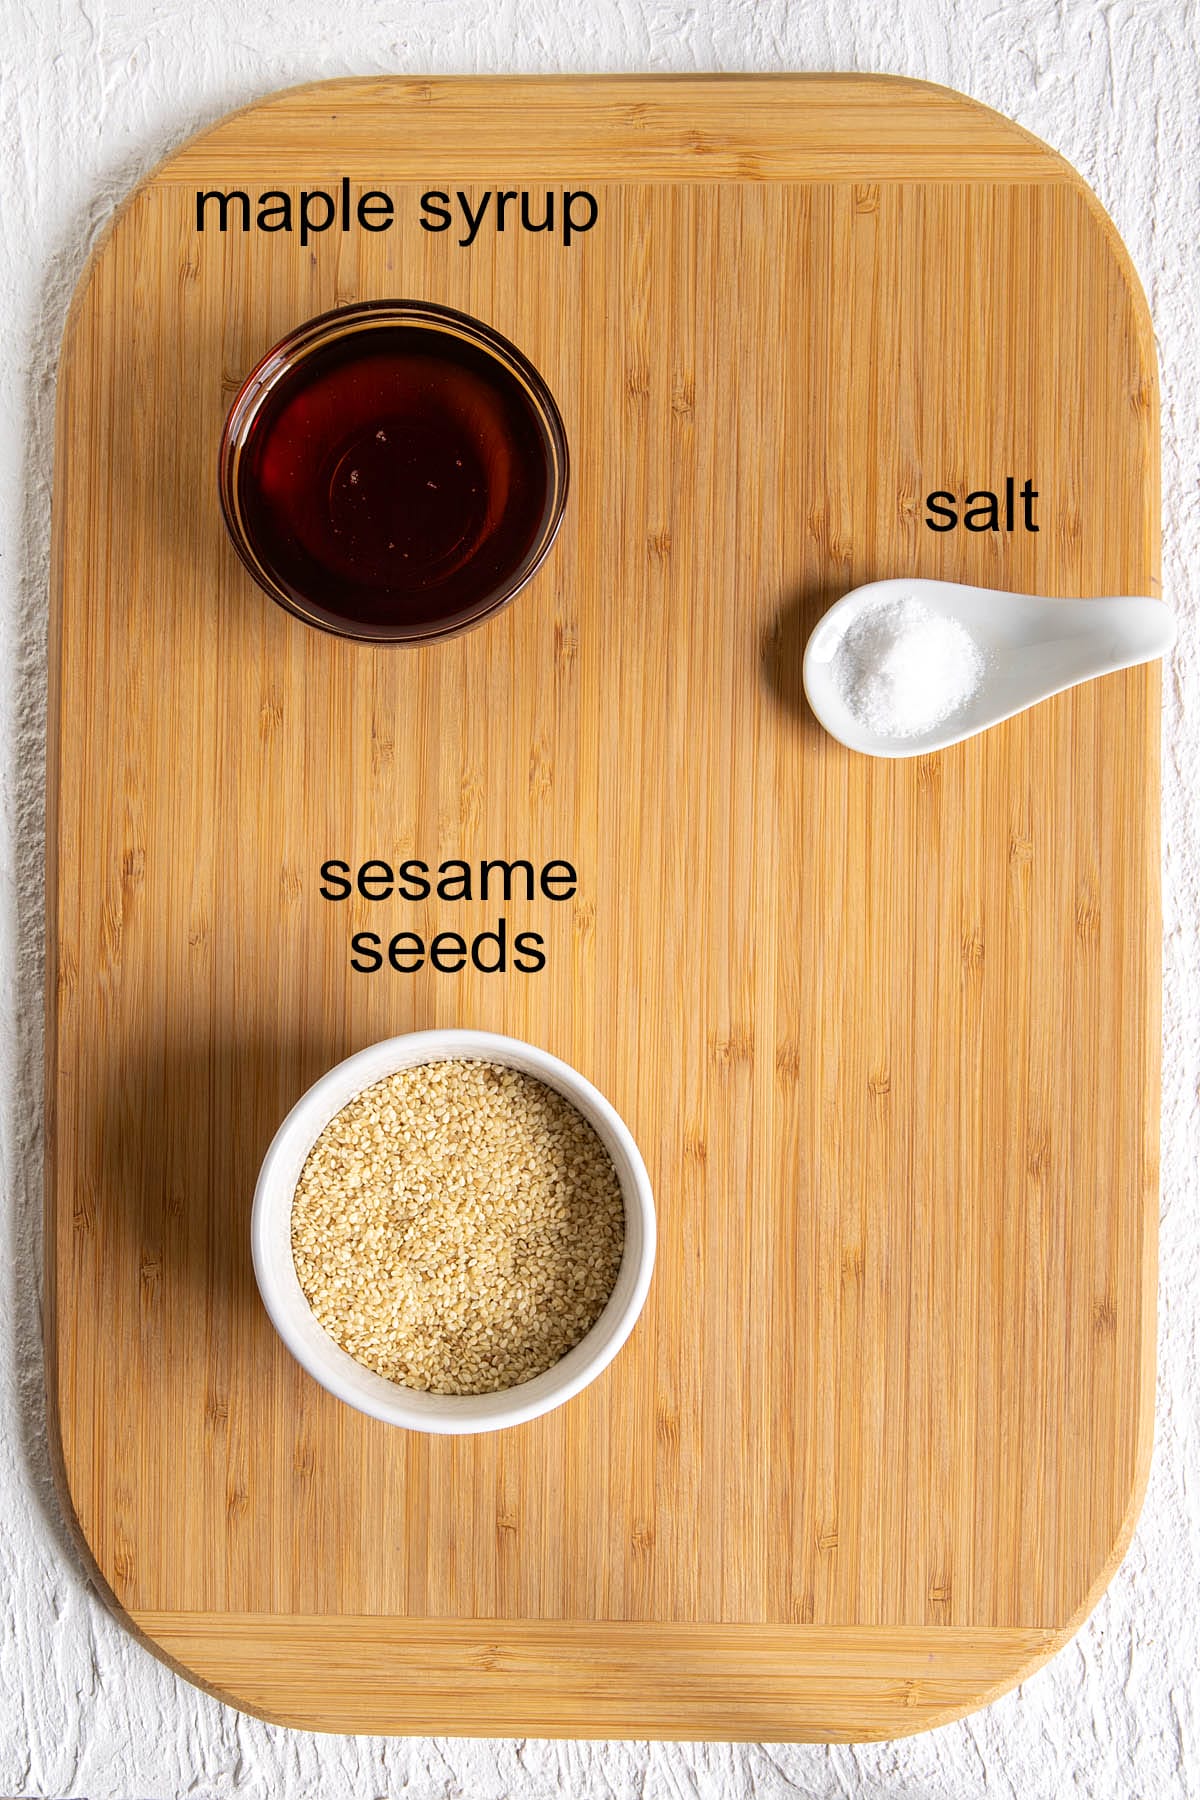
- Sesame seeds: I used raw sesame seeds that I toasted. You could also use toasted sesame seeds.
- Maple syrup: I like the flavor of maple syrup, but agave syrup would also work.
- Salt: Brings out the sweetness. I like to use sea salt.
To see the full list of ingredients with measurements and instructions, see the recipe card at the bottom of this post.
FREE EBOOK!
Sign up to get new recipes and the FREE 7-meal plan that saves you hours.
Shopping list included!
Unsubscribe at any time.
🔪 Instructions
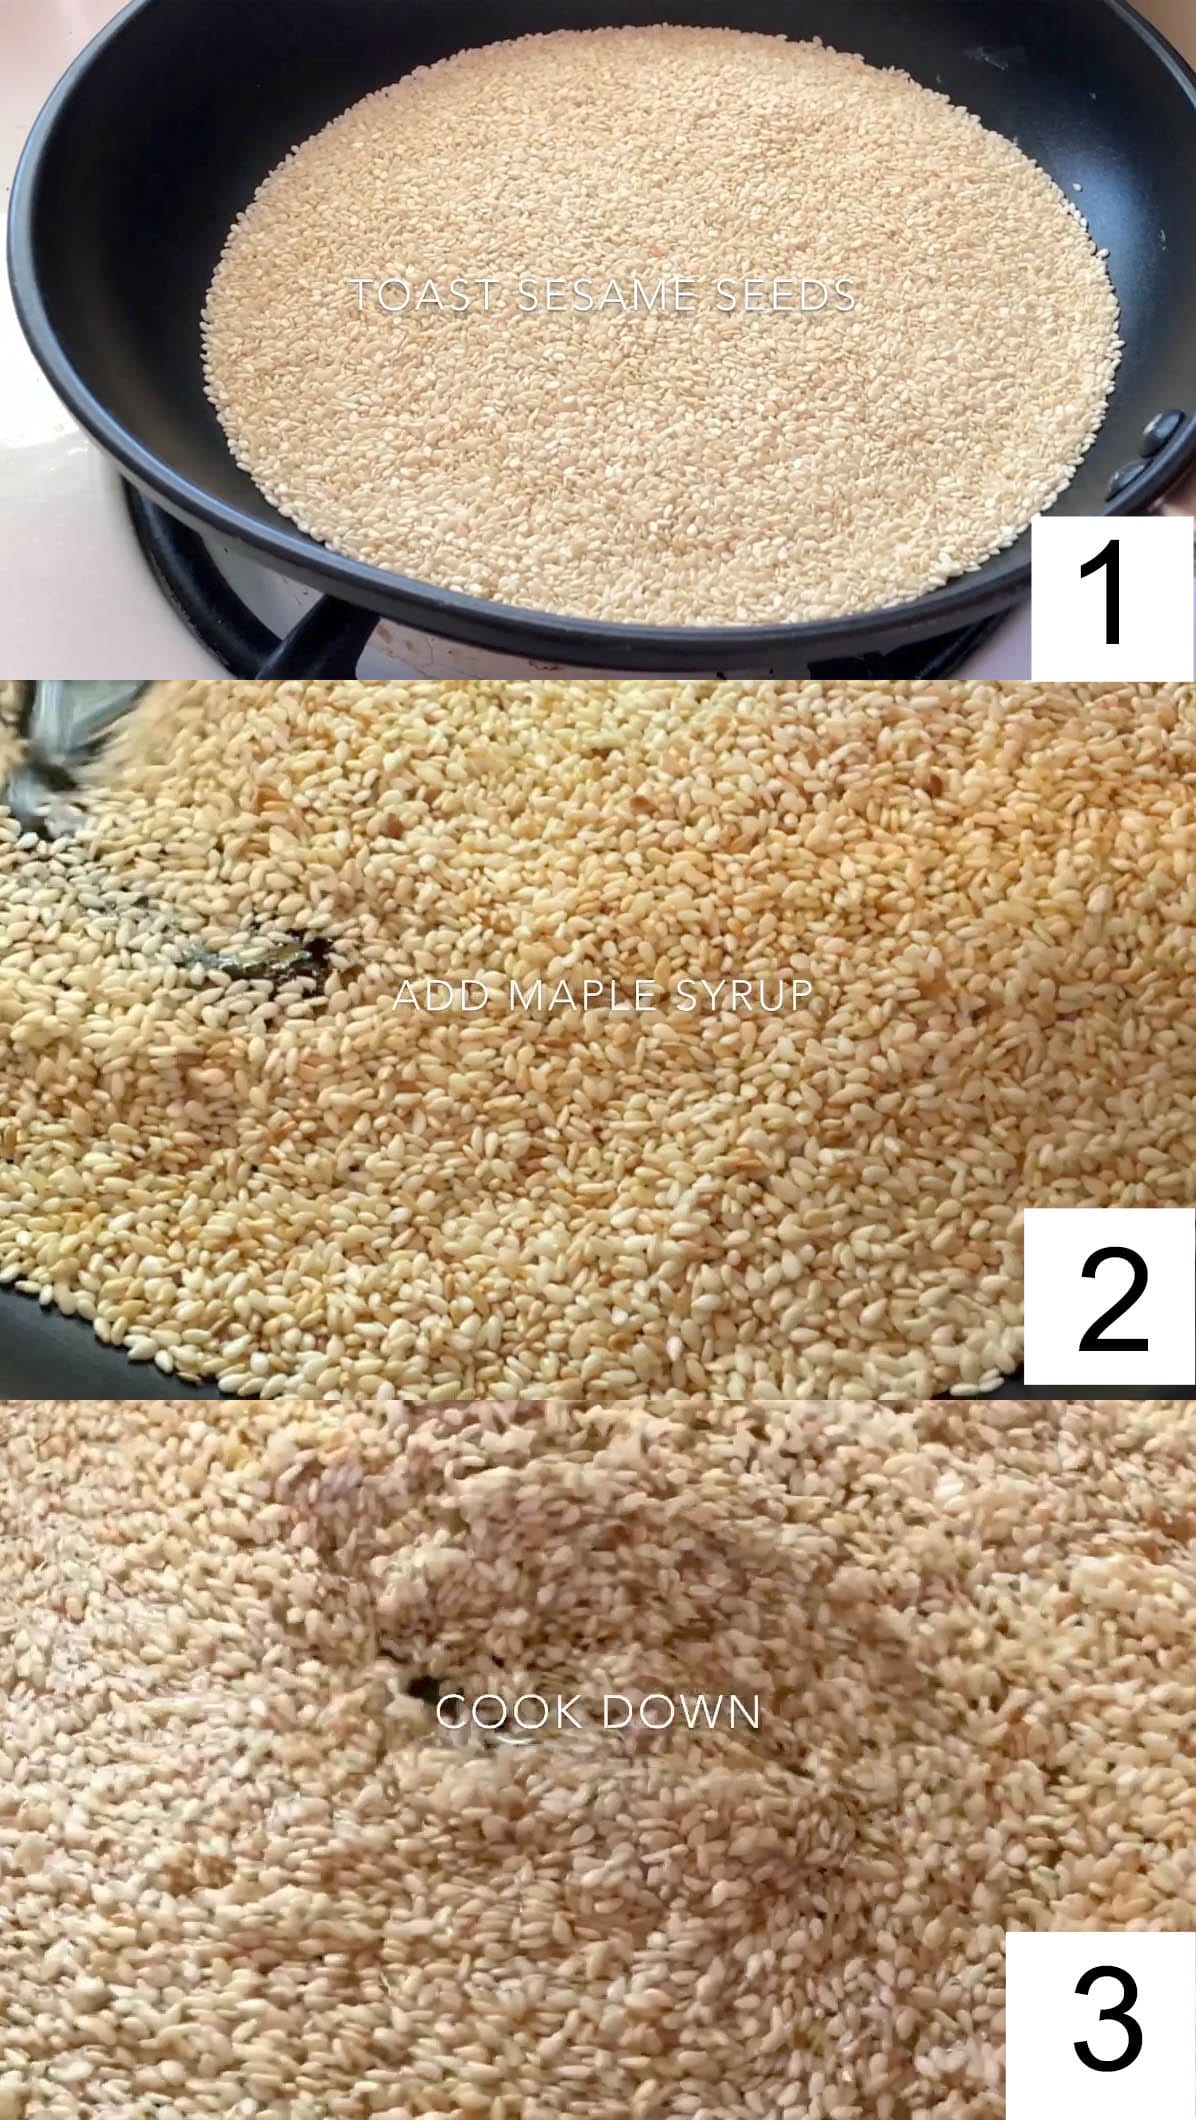
Step 1: Toast sesame seeds until golden and fragrant.
Step 2: Stovetop method: Add maple syrup and salt.
Step 3: Cook until maple syrup cooks down, stirring constantly.
Oven method: Mix ingredients and pour on a baking sheet with double-lined parchment paper, or aluminum foil with parchment paper over the top, making sure the bottom layer has a lip.
Two layers are necessary because the mixture will leak under the first layer and this will protect your baking sheet. Bake for 30 minutes. Cut when the mixture hardens slightly but is still somewhat soft.
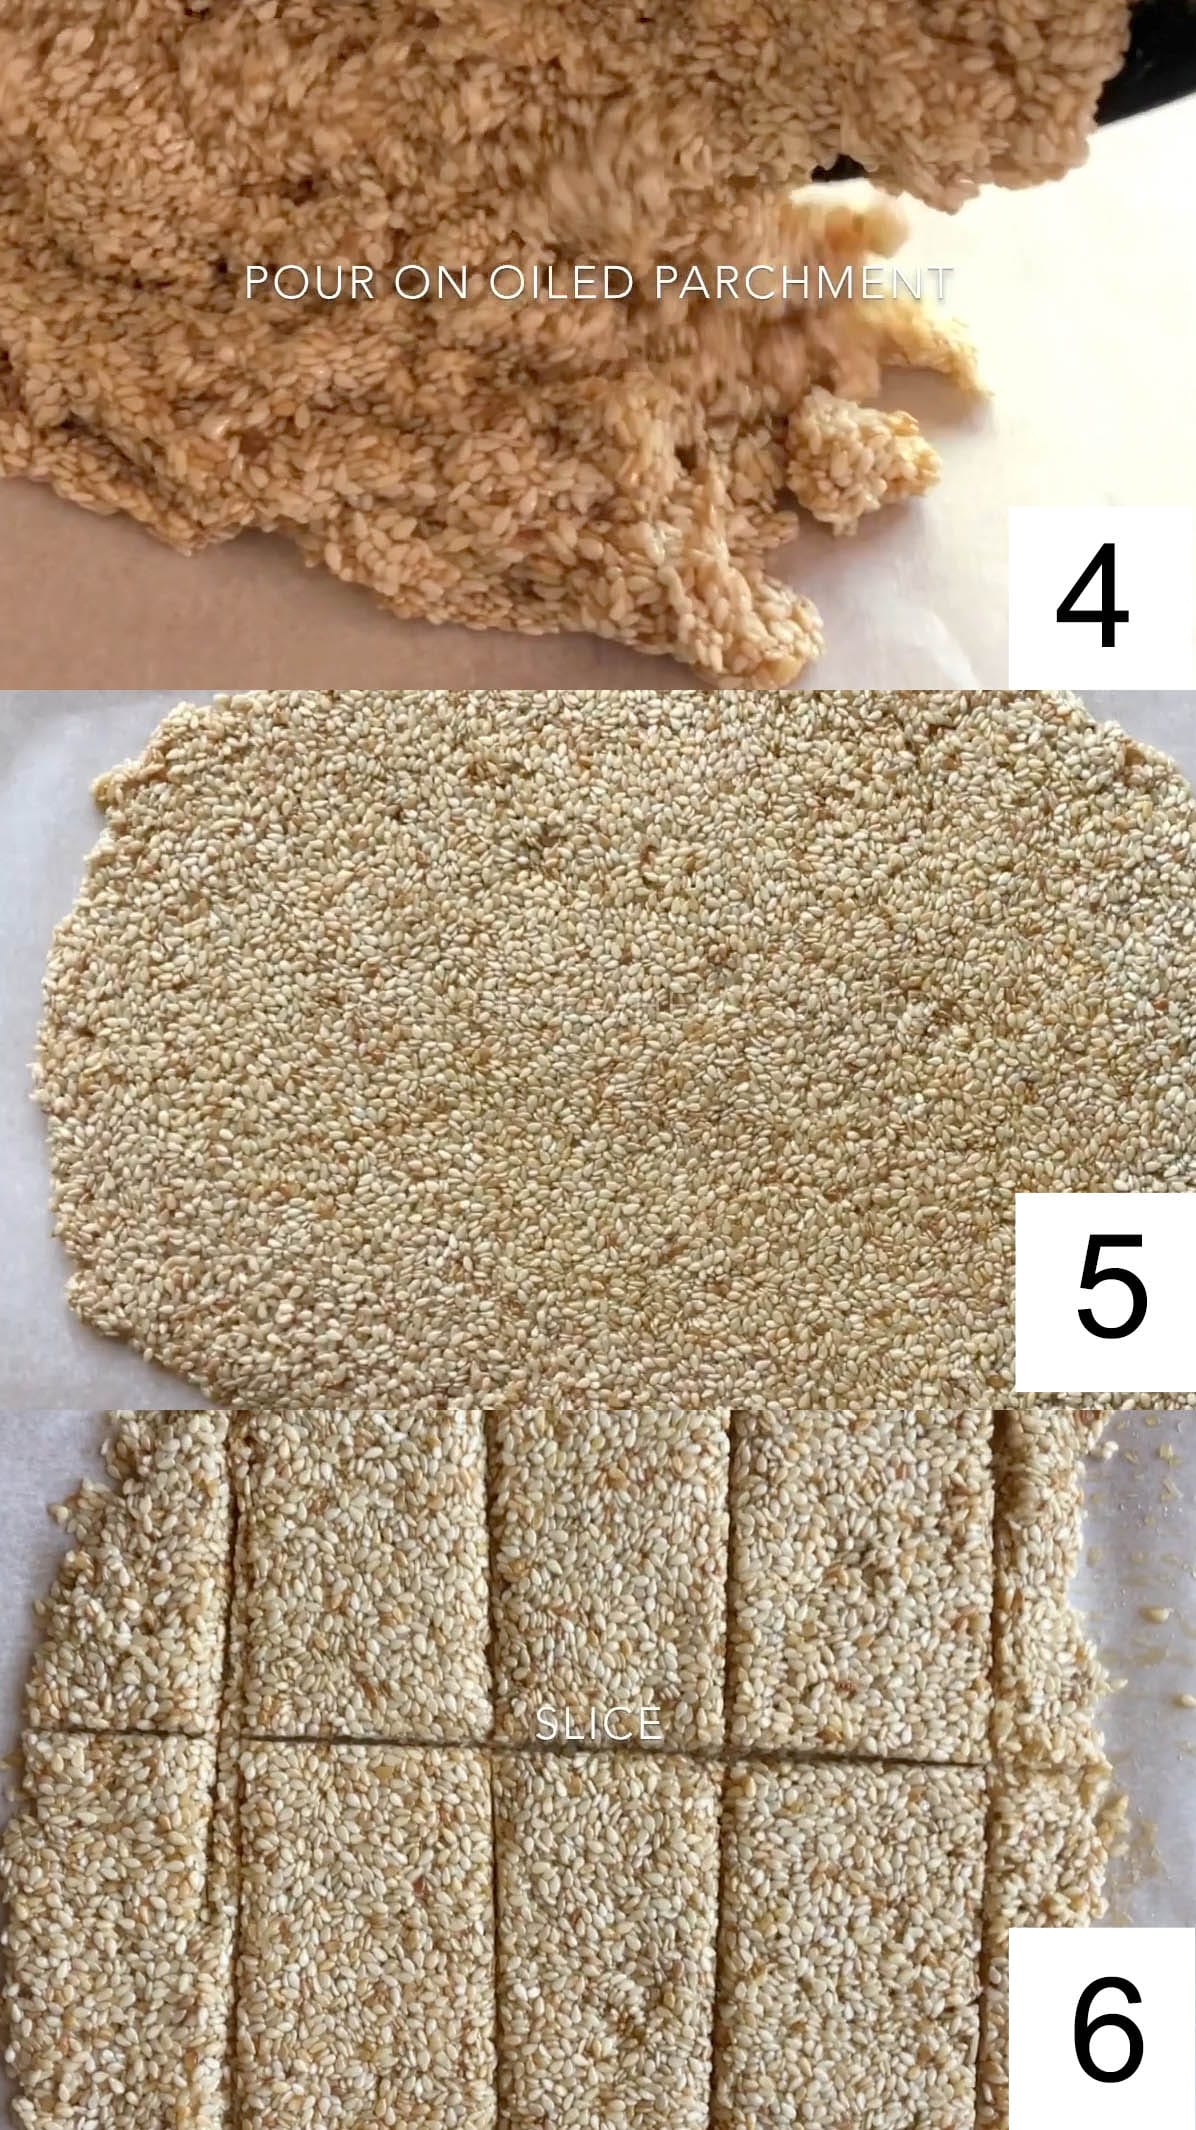
Step 4: Pour the mixture on a Silpat baking mat or parchment paper that has been sprayed with cooking spray. Place another piece of parchment paper on top, that has also been sprayed with cooking spray.
Step 5: Use a rolling pin to roll out evenly.
Step 6: Cut when the mixture hardens slightly but is still somewhat soft.
💭 Tips
- If you're making your sesame crunch in the oven, I recommend a double layer of parchment paper or aluminum foil under the first layer of parchment. Otherwise, the mixture leaks under it and leaves a sticky mess on your baking sheet.
- If you do find yourself with a sticky baking sheet, or pan from the stovetop method for that matter, soak it for a while and it will come clean easily. (It doesn't seem like it will when you first see the sticky mixture stuck on, but don't freak out.)
- If you prefer the stovetop method, which comes together quite quickly, you'll need to watch over it. It literally takes only a few minutes.
- Cut the mixture after it's set a little while, but still soft. That way you'll get nice straight edges.
")
Other Vegan Snack Recipes
🎥 Video
If you tried this Sesame Crunch Bars Recipe or any other recipe on my website, please leave a ⭐️ star rating and let me know how you like it in the 💬 comments below. I love hearing from you!
These sesame bars are perfect for on the go!
📋 Recipe
Sesame Crunch Bars
Instructions
- If doing oven method, preheat oven to 325°F.
- Toast sesame seeds in a pan on the stovetop for about 5 minutes until golden and fragrant.
- Stovetop method: Add maple syrup and salt. Cook down about 3-5 minutes until maple syrup cooks down, stirring constantly.
- Pour mixture on a Silpat baking mat or parchment paper that has been sprayed with cooking spray. Place a parchment paper on top (that has also been sprayed with cooking spray) and use a rolling pin to roll out evenly and flatten. Cut when mixture hardens slightly, but is still somewhat soft.
- Oven method: Mix ingredients and pour on a baking sheet with double lined parchment paper, or aluminum foil with parchment paper over the top, making sure the bottom layer has a lip. Two layers are necessary because the mixture will leak under the first layer and this will protect your baking sheet. Bake at 325°F for 30 minutes*. Cut when the mixture hardens slightly but is still somewhat soft.
Notes
Nutrition
💌 SAVE THIS
*Note: Nutrition information should be considered an estimate only. Different nutrition calculators give you different results.

Cindy mays says
I made two trays of these …my child self use to buy these like at age 8 at a health food store nearby we use to frequent. One batch without any spray oil and one tray with melted coconut oil. The non oil tray was crunchy. I prefer using no oils. The other tray ended up sticking to my teeth. Not pleasant. Also no rolling pin method needed. I spread the batter out into a square shape with a rubber scraper. Was a perfect 1/4” I will make these daily
Kathryn Gannon says
Talking of sticky messes, I have found if you soak your pans etc; in hot water and baking powder it comes off really easily not bi-carb baking powder.It seems to work on anything.
tammy says
I am about to make these bars tonight .
I just failed with a different recipe that had coconut oil... they didn't harden at all! How are these for holding up as a gift in a bag?
thanks for your input 🙂
Willow Moon says
These hold up nicely. The maple syrup hardens making hard bars. If you’re putting them in a gift bag you may want to protect them with cushioning so they don’t crack.
Tarryn says
Could this recipe be done with honey instead of maple syrup?
Willow Moon says
Yes, that's actually the way it's traditionally made.
Gail Whitney says
I made these bars using the stove top method, and I split the maple syrup half and half with light agave syrup. Absolutely yummy !
Willow Moon says
Thanks Gail, I’m so glad you liked them!
Lisa says
Just made it and it's delicious!! Thank you for the recipe.... will definitely make them again😊
Willow Moon says
Thanks Lisa, I'm so glad you liked it!
Robert Nissenbaum says
Great recipe......simple to make, very healthy, wonderful snack. I successfully used less sweetener. Just a matter of taste.
Willow Moon says
Thanks Robert, I'm so glad you liked it! Less sweetener is always a good thing!